Sunday, June 1, 2014

Simple Science - Bi Carb Rocks and Vinegar

Bubble and Squeak are both home sick at the moment, and for two little people who are usually continually on the go that spells boredom. And for me, insanity ;)
One of the activities that has been keeping them happily amused is a simple science experiment that I used to love doing when I was little too - bi carb and vinegar reactions.

WE USED:

* bi carb soda
* water
* white vinegar
* food colouring
* glass jars
* pipettes/eye droppers

I filled some jars with cheap white vinegar and a few drops of food colouring, then added some pipettes so the girls could drop the vinegar into the bicarb slowly and create patterns.

The day before I mixed some bi carb with a bit of water to create a paste, then left it to dry in open containers. Once it was dry I broke it up into 'rocks' so that the girls had something they could hold and investigate a bit easier than dry bi carb powder.

Both of the girls loved dripping coloured vinegar on to the bi carb soda rocks and watching the chemical reaction cause an eruption of bubbling foam. 
These bubbles are caused by the exchange of protons between the vinegar and baking soda, which creates water and carbon dioxide.

They experimented with the different colours and using two or three different pipettes at once.

Once the fizzing and bubbling subsided after each dropper was emptied they were left with multicoloured rocks.


They were fascinated with the changing size, colour and texture of their rocks.


Bubble wore little holes through the middle of her rock with the vinegar until she was able to break it in half and have a look at the inside.

It was full of rainbow coloured rings and she told me "it looks like a geode Mum!".

Lots of hands on science fun and a great way to pass a day at home fighting some yucky bugs.


Thursday, April 24, 2014

Whiteboard and Play Dough Dinosaur Play

Both of our girls are into dinosaurs in a big way, so anything involving Tyrannosaurus Rex and play dough was always going to go down well.
This activity was one we did recently which they both enjoyed and also incorporated a lot of great fine motor development for Squeak, particularly her pen grip and drawing skills.
Plus, it was just plain fun.

WE USED:

* a whiteboard
* whiteboard markers
* dinosaur toys
* play dough
* shallow dish of water

We laid our whiteboard down on the table and the girls got to work creating a dinosaur landscape, including a nest.

They wanted somewhere for the aquatic dinosaurs to swim so we added a pie dish with water in it to one side.

Once they were happy with their dinosaur world I gave them some 'dinosaur eggs'.
To make these I wrapped toy dinosaurs in play dough and then rolled the dough into an egg shape with the dinosaurs inside, ready to be hatched.

The girls had a lot of fun hatching their eggs, playing with them in the landscape they had drawn and also in the water.

They made up stories and added to their whiteboard picture as they went.

The hatched play dough eggs became a big mud pit for the dinosaurs to stomp around in and hide from the Tyrannosaurus Rex.

The 'dinosaur lake' got a work out too!


Monday, April 21, 2014

Paper Plate Witches Hats

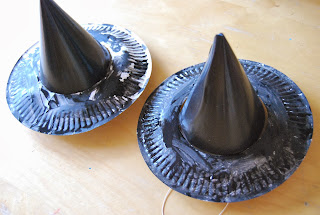
Bubble and Squeak dressed up as witches for a party recently and we made these super cute little hats to go with their costumes.
They were very simple and fun to make using things we already had stashed in the cupboards.

WE USED

* party hats
* paper plates
* scissors
* tape
* black paint and brush
* optional - black contact paper


First we covered our party hats in black contact paper by unfolding them and then tracing their outlines onto the paper backing of the contact. That made it easy to cut the contact to size, cover the hats and then reassemble them with sticky tape.
You could also turn the party hats inside out like we did in THIS POST and paint them black instead.

Next we used scissors to cut the center from our paper plates.

Slide the paper plates over the top of the party hats to see if the center hole is big enough before painting. You want the plate to sit low on the hat, but not so low that it falls off!

Once you are happy with the plate size you can paint it black too.
Or any colour really, who says all witches hats are black, right? :D

Once the plates are dry you just slip them over the top of the party hats to make cute little witches hats. 
We secured the plates to the hats using tape on the underside.

The party hats already have elastic attached so the witches hats stay on well.

Two little witches ready for a Wonderful Wizard Of Oz party!

Easy Lunch Idea - Hamburger Shapes

I have written in here before about the challenges we face getting our two girls to eat certain foods, and meat is one of them! 
Many kids with Autism are selective eaters due to sensory sensitivities, for our girls it is largely colour and texture that determines whether or not they will eat something, or even try it.
As they have gotten older we have found ways to get them to try a wide variety of foods (see my earlier post here on fussy eating) and cookie cutters have been my saviour many many times.
Recently I decided to try my trusty cutters to make some hamburger shapes to see if I could add a bit of variety to the girls lunches. Not only were they very easy to make but they were also a big success!

WE USED:

* high quality mince meat
* cookie cutters

I made our hamburgers with plain mince, you could add anything you like to them - grated vegetables, spices, garlic, onion, herbs. Our girls are very sensitive to new smells and tastes, so I always start basic!

Spread the mince to a thickness about half that of your cutter, then use the cutter to create your shapes.
I used a butter knife to help cut the shapes where the cutter didn't go all the way through.

Once you have made your mince shapes you can cook as you would normally. I made a heap of them and froze some for later!

 
Both Bubble and Squeak were more than happy to try 'hamburger stars' for lunch and now I have something else I can add to our meal rotation.


Thursday, April 17, 2014

Streamer Jumping

This is a fun easy activity our girls like to play on the trampoline, it's a great gross motor exercise and has been helping to burn off some of their excess school holiday energy!

WE USED:

* streamers
* strong tape
* scissors
* trampoline

You can attach your streamers to your trampoline however you feel is safest for your child/trampoline, we just use strong tape to attach ours to the net.

Today we just put one length of streamer straight across because the girls wanted to practice hopping and jumping like the Easter Bunny, it's also fun to create a big web of streamers for the kids to weave in and out of as well.

Lots of hopping and jumping fun from one side to the other.


The girls also like to crawl and roll underneath and make up stories to go along with their play.

The streamers provide an extra element to playtime on the trampoline without causing obstruction since they simply snap or fall down if one of the kids lands on them.
Thanks to the tape they are also easy to put up again and change their position.

Tuesday, April 15, 2014

Hula Hoop Ring Toss

The weather has been very rainy here lately so getting girls outside to play has been harder than usual some days. We set up this activity a few days ago and it has been keeping them entertained for ages, adding new obstacles and learning new throwing techniques.
Not only is this game of benefit to the girls gross motor development but they've also been doing a great job of turn taking, making up imaginary story lines to accompany their play and problem solving.

WE USED:

* hula hoops
* an object small enough for the hoops to loop around
(we used an upturned storage basket)

An upturned storage basket was the perfect size for our hoop game and heavy enough not to move too much while we played.

The girls tried out all kinds of throwing techniques to see which ones worked the best.


They tried over hand, under hand, frisbee, taking a run up, jump throwing - you name it they tried it out!


Great shot :)

Thursday, February 6, 2014

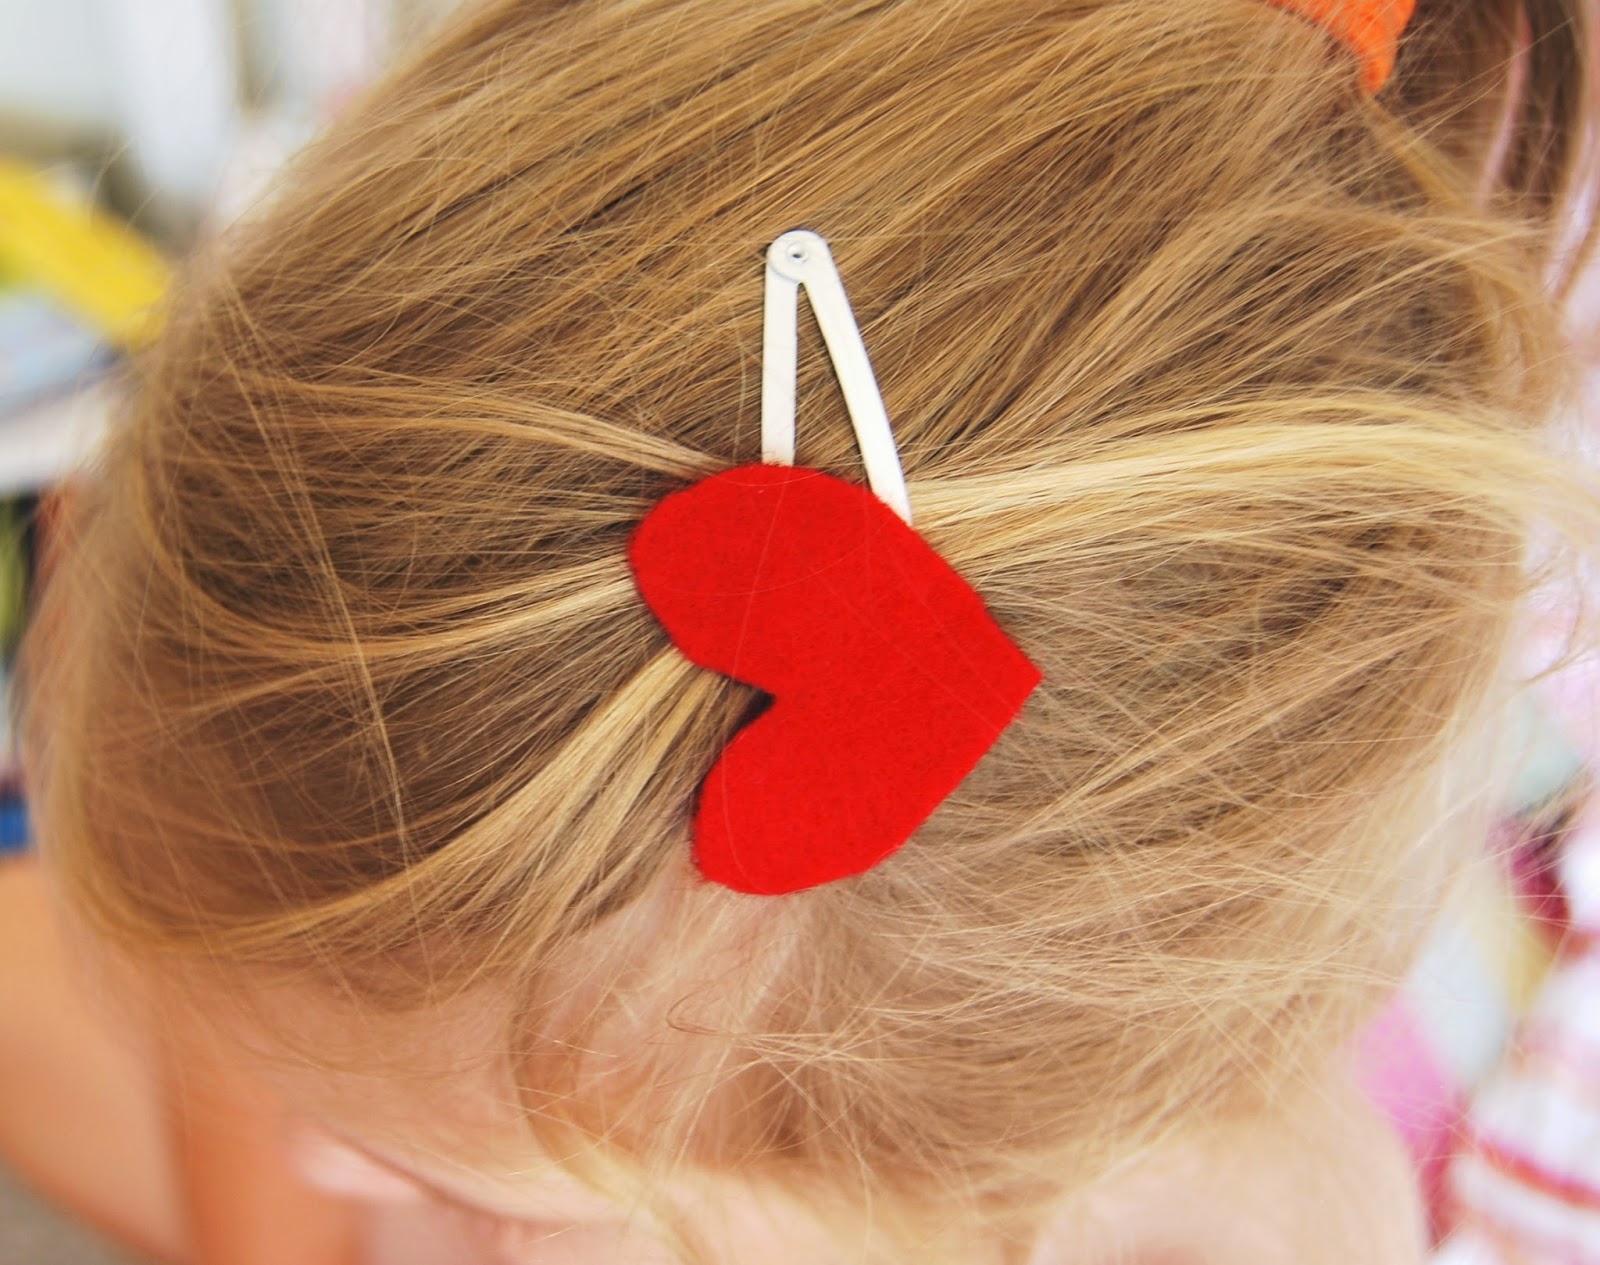
Easy Peasy Valentine's Day Hair Clips


 This activity was easy and fun for both of the girls to do and as a bonus incorporated a lot of fine motor practice as well.

WE USED:

* felt sheets
* laundry markers
* scissors
* hot glue gun / craft glue
* hair clips

Don't have a glue gun or felt? Why not try this activity using cardboard/paper and double sided tape instead to make temporary hair clips for Valentine's Day.

First the girls used the laundry markers to draw hearts on their felt.
You could draw any shapes you like or even draw pictures and cut around the outsides of them, but both Bubble and Squeak had their hearts set on hearts!

Using scissors cut around the outside of your shapes.
Bubble could do this on her own easily, Squeak still needs my help with tasks like these.

Once the girls had finished making their felt shapes I fired up the glue gun and they put a blob of hot glue on the ends of their hair clips

Then they could easily turn the clips over and (holding the cool end of the clips only) press them onto the backs of their felt shapes until the glue dried.
If you have never used a glue gun before please note that the gun, the glue and the object you are gluing get very hot. My girls were well supervised and did not touch the clips until the glue had cooled and set.

We made a whole stack of clips in under fifteen minutes - a nice fun after school activity that would make great presents as well.