Showing posts with label Letter F. Show all posts

Saturday, November 20, 2010

Toadstool & Fairy Peg Matching Mat

Awhile ago we got some cute little fairy pegs from our favourite toy store (The Toy Bug) and I've been wanting to do 'something' with them ever since but wasn't quite sure what. Bubble and I were doing some fine motor activities clipping them around the outside of an empty icecream container yesterday when she said to me;
"Mum, my fairies have no houses. Poor fairies, they can't sleep!".
So last night I finally did 'something' and made a little fairy house matching mat to go with the fairy pegs.
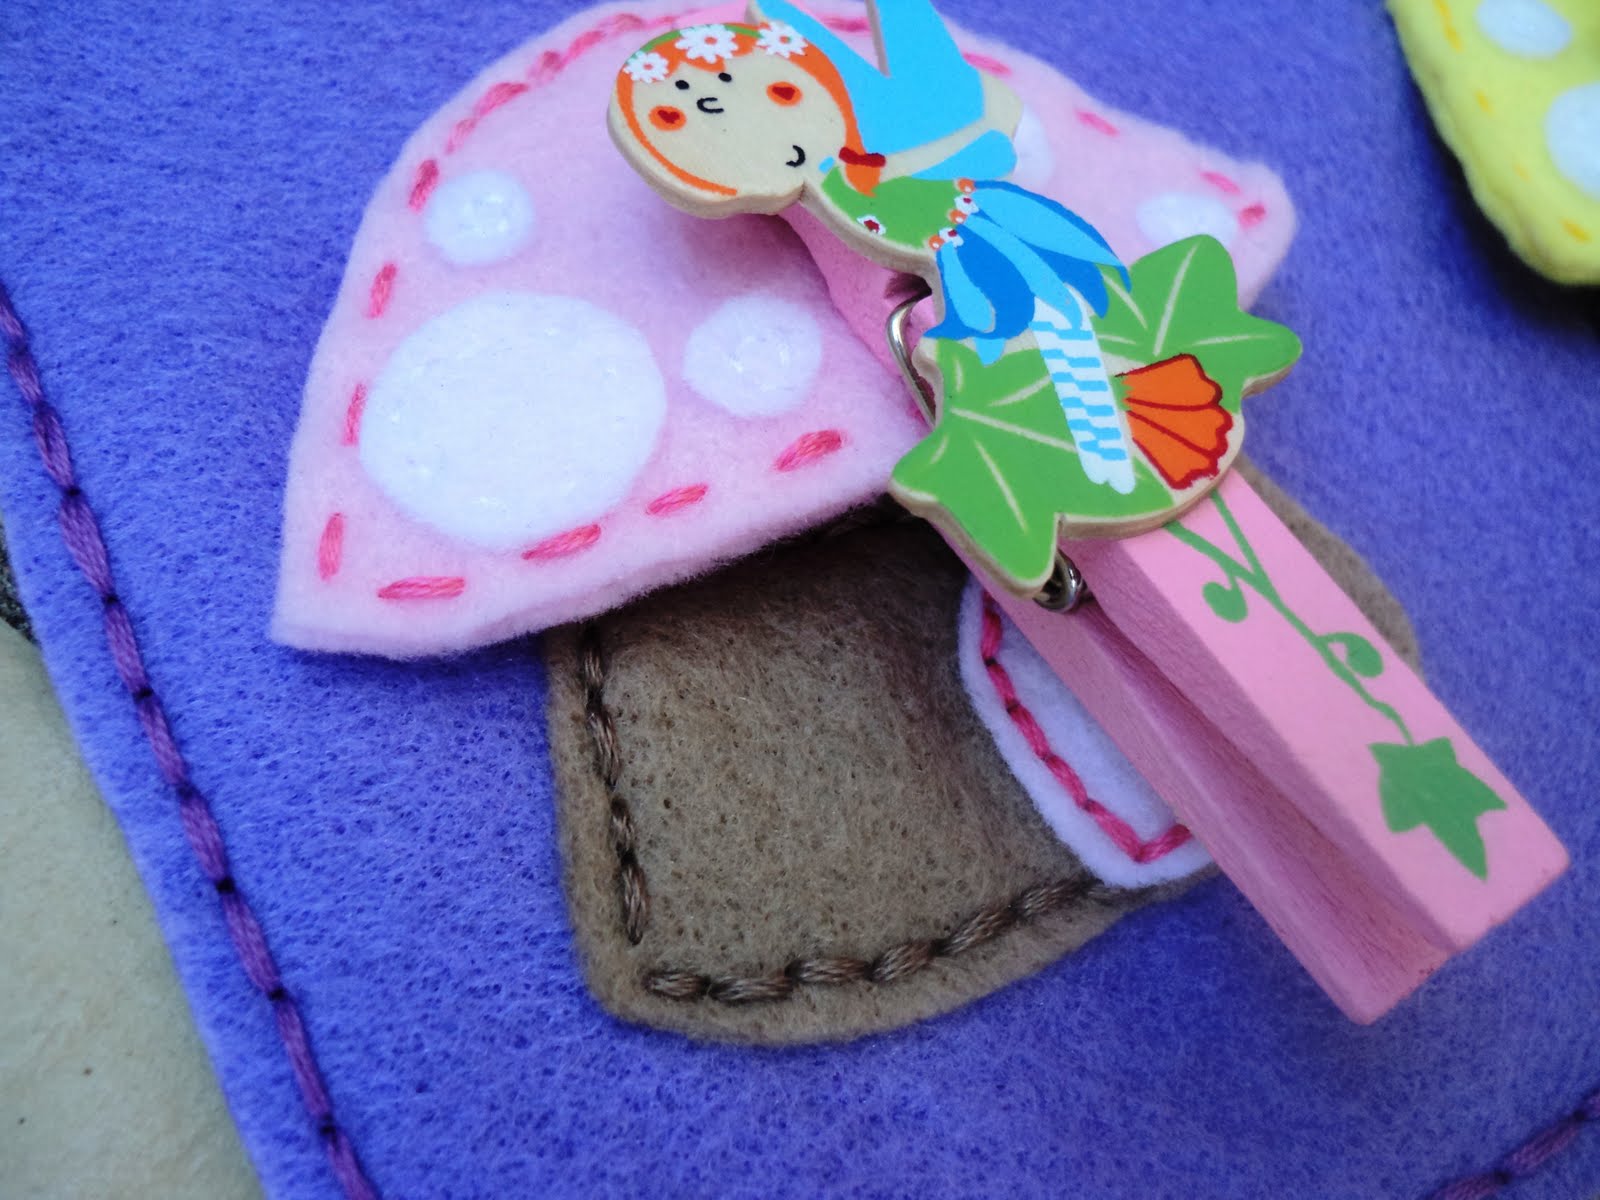
The idea is very simple, the bottom of the toadstools are sewn flat to the mat and the caps are attached only at the top allowing them to be lifted and the pegs clipped on. Each different coloured fairy house matches a fairy peg so this mat is a colour sorting game as well as a way to practice fine motor skills and imaginary play.
Bubble was rapt with it when she saw it this morning and has been carrying it everywhere, matching the peg and house colours and making up elaborate stories where the fairies all visit each others toadstool houses for 'sparkly tea'. Im sure we'll find plenty of other uses for this mat in future games, but for now I'm very happy that our peg fairies finally have somewhere to sleep :-)

Sorry the photos are so dark and don't show the colours very well, you get the idea though!

The various coloured fairy houses waiting for their fairies to find them.
The mat is double sided for durability (and to hide all of my messy threads!).

Little toadstool fairy houses.


The stalks are sewn flat while the caps are only sewn at the top so that they can be lifted.

Our very cute fairy pegs. There are 6 altogether, all different colours.

The fairy pegs simply clip onto the toadstool caps so it looks as though they are sitting inside their houses.


Wednesday, November 17, 2010

Rainbow Fan

It's been hot lately where we live so I thought we could make a paper fan as a craft activity this week. We already had the paper plates out after making the ring toss game so I cut the bottom off one of them to make a fan shape. Bubble decided it looked like a rainbow and the end result is very bright and colourful, as well as useful!

WE USED:

* paper plate
* scissors
* paint
* toilet roll tube
* coloured contact

To make the handle I covered the cardboard tube in contact and then cut two slits on each side at one end for the plate to slide into.

Friday, November 12, 2010

Milk Bottle Jumping Frogs

Ok, so I'm pretty excited that this idea actually worked! I thought maybe I'd been staring at milk bottles too long but not only do these jumping frogs do exactly what I was hoping (namely jump), Bubble also thought they were hugely fun :-)
This idea could easily be adapted to make spiders, rabbits - anything you like really.

WE USED:

* empty milk bottle (plastic)
* scissors
* googly eyes
* green and red paper
* glue/blutack
* pencil

Cut the base from an empty milk bottle or other bottle made of flexible plastic (juice etc...) about halfway down the bottle. Cut the base as shown in the photos above and below, leaving four 'legs'.


Bend the end of each 'leg' section at the end so that the tab faces outwards.


You can decorate your frog however you like (paint, glitter, stickers, contact) but we just glued green circles cut from construction paper to the top.

To make a tongue for your frog cut a strip of red paper and wind it firmly around a pencil.

Using blutac attach your frogs eyes and tongue.


To make your frog jump you simply press and flick on the back end (as you would with toy jumping frogs).


The best mid air action shot I managed to get of our jumping frogs!

Bubble had a stack of fun doing this activity, we'll be making more and decorating them in different ways for outside play at the park.


I cut a lilypad from another sheet of construction paper and we took turns to see if we could jump our frog onto it from varying distances.
You could make numbered lilypads and use them as a counting game, jumping the right number of frogs onto each, or just one frog onto correct answers.

Bubble insisted that her frogs needed water, so a sheet of blue paper and we had ourselves a pond :-D

This idea has been shared on ABC and 123 Show & Tell Blog Hop.

abc button


Thursday, November 11, 2010

F is for Friends

This afternoon we made another sound wall activity for the letter 'F'. While Bubble was at preschool I cut some felt shapes so that we could make some toilet roll people when she got home. I based the hair colours/styles on a couple of her little friends at school and she thought it was the best thing ever making miniature versions of her mates! :-D
The superhero toilet roll dude was just for fun, I got a bit carried away with my felt cutting...

WE USED:

* felt (fabric, coloured paper, ribbons etc...)
* toilet rolls
* textas/markers
* 'googly' eyes
* glue/blutack
* scissors

I precut some felt hair and clothes.

Bubble got busy gluing it all together. She found positioning the felt tricky at first but got better and better as we went along. We ended up using blutack to attach the eyes instead of glue as it didnt stick all that well (and Bubble enjoyed moving their eyes around :-D).


Bubble's mini friends :-)

A mini superhero - isnt he cute!


Wednesday, November 10, 2010

F is for Fairies

These little fairy paper dolls were easy to make and perfect for our letter wall theme 'F'. I used a great template page I came across on the net (link found here), and think the alien is also pretty awesome and would love to give it a go sometime soon! Bubble chose to decorate them with texta, glue, glitter (oh so much glitter!) and felt pieces she cut with scissors.

WE USED:

* template
* scissors
* markers
* glue
* decorations for your fairies

I cut some paper dolls using the fairy template on some lilac purple scrapbook pages. I realised after Id cut the first one out that I should have drawn the template on the reverse instead of the front though! Luckily Bubble didnt seem to mind :-D
For anyone who has never made joined paper dolls, Im so sorry I forgot to take photos of the process, but this link is a great written tutorial:
eHow Making Paper Dolls

Bubble had a lot of fun using copious amounts of glitter on her fairies (getting the excess glitter out the rug was a tiny bit less fun)

She also used her scissors to cut bits of felt from strips we had.

One fairy has more felt decorations than the others because she is 'the Mum Fairy' aparently :-D


Monday, November 8, 2010

Wax Paper Flower Hangings

A little while ago we made a phonebook flower press and today we opened it up to see the results. The flowers had dried really well and Bubble was intrigued at how flat they were, "like paper". We used wax paper to turn them into a pretty window hanging, and Im thinking we will do this activity again using paper shapes and cellophane to make some christmas wrap.

WE USED:

* flat dried flowers
* wax lunch wrap paper
* iron
* old newspaper
* coloured cardboard
* tape
* scissors

We opened our phonebooks to find our flowers looking great!

Cut two sheets of wax paper to the same size. Lay one sheet wax side up (feel the paper, one side is smooth and the other feels waxy) and arrange your flowers on top (or whatever you are using for decoration; cellophane, confetti, paper shapes etc...).

Bubble took her time arranging and rearranging her flowers.

Lay the second sheet of wax paper over the top, wax side down.
So the two sheets of wax paper should be facing each other wax side IN, with the flowers in between.

Use a warmed iron to seal the two sheets together. I used my iron set quite hot and it did the job quickly and easily. If you are worried about wax transfer to your iron lay a sheet of baking paper over the top before ironing.

We decided to make a frame, you dont have to of course! To make our frame I cut the centre out of a sheet of corrugated cardboard.

Tape your wax paper picture to the window so the light can stream through it.
The photos don't show how pretty it looked up on the window unfortunately!

Bubble added her frame where she wanted it. We decided not to trim the edges so we could keep all of the flowers. I think this would also look great in an embroidery hoop or something similar.


It makes a very colourful pretty display.

“Come play at the Childhood 101 We Play link up”

We Play