Showing posts with label Paper Plate Craft. Show all posts

Wednesday, May 4, 2011

Paper Plate Stencils

Sorry for the long delays between posting, we are doing a lot of work on Bubble's ABA program which is taking up most (all really!) of our spare time. Both Bubble and Squeak are showing benefits from it though, so we're very excited about that :-)
This activity is one we have done a few times before using both ice cream container lids and paper plates. We find the paper plate versions last for quite a few uses and the the lids last indefinitely.

WE USED:

* paper plates
* scissors
* pen/texta
* paint
* paper
* paint brush

Draw your stencil designs directly onto the base of your plates (or lids).

Cut out carefully using scissors or a craft knife.


Friday, April 22, 2011

Happy Earth

For Earth Day yesterday we did a simple sorting activity similar to our "How Do I Feel" game. Since Bubble is so young I kept the concepts simple, such as; 'recycle and reuse', 'walking instead of driving our car' and 'planting trees' for some of our happy earth statements and 'wasting water', 'throwing our rubbish on the ground' and 'not taking care animals and wildlife' as some of our unhappy earth statements. For older children you could use more complex ideas or even focus on one topic such as pollution or looking after the ocean.
I wasn't sure if Bubble would be very into this activity but we've played it five times over since yesterday afternoon, so I think it was a success!

WE USED:

to make our earth faces:

* paper plates
* blue food colouring
* paint brush
* green paint
* permanent marker

For the game:

* paper plate earth faces
* blutack (or sticky tack)
* statement cards
(made by cutting up speech cards and writing statements that have a positive and negative impact on the Earth. We made seven for each but you could do as many as you like!

Our Earth faces were made by painting paper plates with blue food colouring to get a watery effect, then adding green paint after it was dry.

We then drew on our faces with permanent marker
and stuck them to the wardrobe door with blutack for our sorting activity, but this could easily be done on a table top or the floor too.

I read out our statements one by one and we talked about what each one meant and which side it should go on.
Some Bubble found easy, such as 'looking after animals and wildlife' and 'wasting our food'. Others were harder such as 'using lots of chemicals in our home' and 'conserving our water'. This game was such a great way to introduce lots of topics to Bubble that we had never discussed before without the whole thing being overwhelming or too confusing. She could identify with the Earth feeling 'happy' or 'sad'.


Friday, December 3, 2010

Paper Plate Christmas Trees

WE USED:

* paper plates (2 sizes)
* scissors
* ruler
* cardboard tube
* paint
* bingo marker
* blutac (or you might prefer to use glue)
* sticky tape
* yellow paper
* cotton ball

Using a ruler to get your lines straight cut three segments from the paper plates, each a little smaller than the last. I cut the biggest and smallest pieces from a large plate and the middle from a small plate, but you could also use the same plate for all three.

This is how the pieces go together to form a Christmas Tree shape.

We made some green paint by mixing yellow and blue together (Bubble is right into colour changing at the moment).

Then the girls painted the segments of their trees.

I cut two trees so Squeak could make one too. I stuck the pieces to her highchair tray with blutac and let her go for it with a paintbrush (and her hands ;-D).

Once the paint was dry Bubble decorated her tree with some 'baubles' by dabbing on ink from a bingo marker. A cotton bud and paint would do the job too :-)


I showed her how to add snow around the edges using a cotton ball and white paint and she decorated all three segments.

We cut a yellow star from our coloured paper and used blutac to assemble our tree. You could also use glue if you wanted, we were just impatient!

Squeak's tree :-)

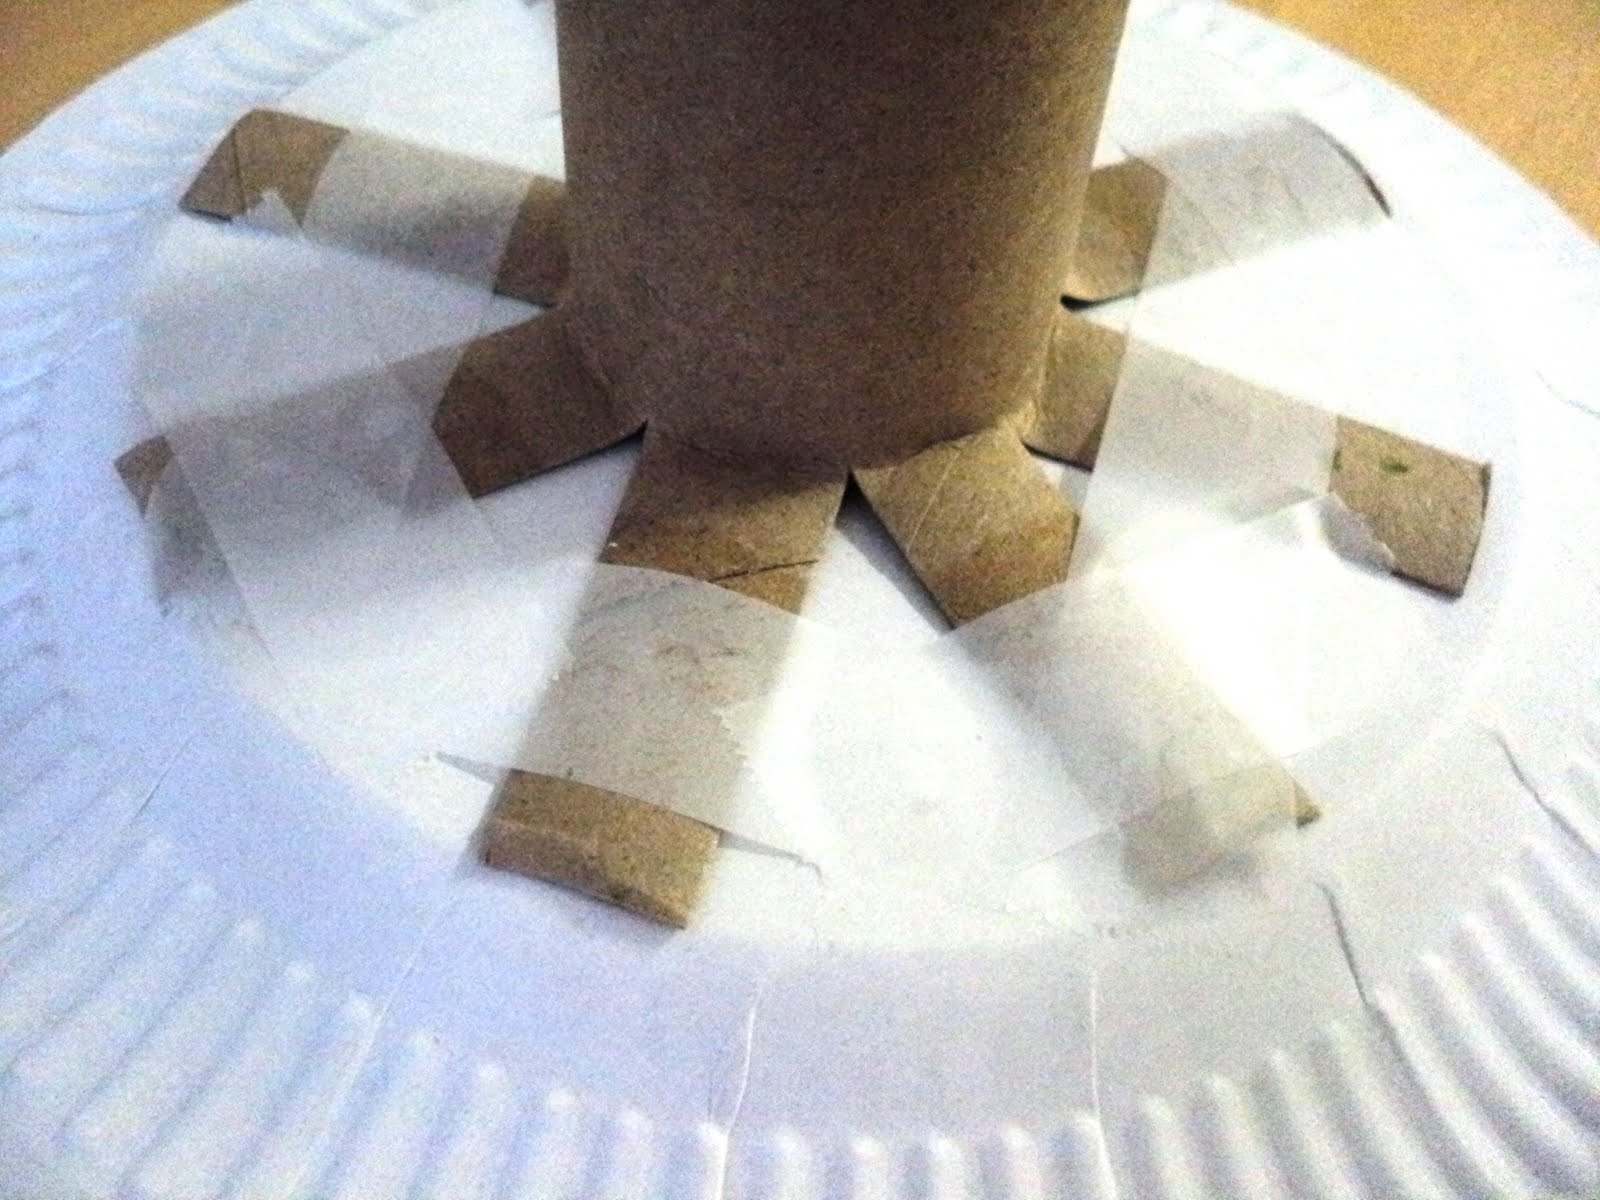
We made a trunk for our Christmas tree by splaying one end of the cardboard tube and taping it to an upturned paper plate for stability.


Our very cute paper plate Christmas tree :-) This is Squeak's side.

And Bubble's side.


Wednesday, November 17, 2010

Rainbow Fan

It's been hot lately where we live so I thought we could make a paper fan as a craft activity this week. We already had the paper plates out after making the ring toss game so I cut the bottom off one of them to make a fan shape. Bubble decided it looked like a rainbow and the end result is very bright and colourful, as well as useful!

WE USED:

* paper plate
* scissors
* paint
* toilet roll tube
* coloured contact

To make the handle I covered the cardboard tube in contact and then cut two slits on each side at one end for the plate to slide into.

Paper Plate Ring Toss Game

Today we made our own take on the traditional ring toss game. Bubble enjoyed playing it and Squeak enjoyed pulling the rings on and off.
This game worked great for Bubble and Squeak who were throwing close range, but if you wanted the rings to be thrown from a decent distance I think the paper plates were not dense/heavy enough. In this case I'd probably either layer and glue several plates together or wrap them in something like string or twine to weight them.

WE USED:

* paper plates
* paint
* scissors
* long cardboard tube (from cling wrap, peper towel etc...)
* sticky tape

Cut the centre from some paper plates to use as your 'rings'.

To make the stand I just cut slits in the bottom of the cardboard tube and flattened the ends, then taped it to the reverse side of a plate so it would stand up.