Friday, June 21, 2013

Magnetic Fairy Houses

We like to utilise all areas of our home for play, and the fridge front is no exception (see links below post for more magnetic play ideas).
These fairy houses are made from basic recycled and craft materials and have provided hours of fun for the girls. 
Not only have they been attached to the fridge and other appliances inside the house but also outside on our garage door and window frames.

WE USED:

* small cardboard box
(we ask for them at our local hardware shops/supermarkets)
* craft knife/scissors
* strong magnets
(ours were $2 for a pack of 8 from Hot Dollar)
* optional : things to decorate fairy houses
We used wrapping paper, glue, buttons and washi tape.

We ask for and collect small boxes from our local shops, they have many uses!

After covering our boxes with wrapping paper (using a glue stick) we cut doors and windows from the front using a craft knife.
We used washi tape to decorate the sides and roof and then used craft glue to attach four large magnets to the back of the fairy house.

The fairy houses attach easily to metal surfaces.
We also added a paper towel tube slide for our fairy friends.

We used buttons for the door handles. They look cute and make them easier for the girls to open and close.

The paper towel tube slide was very easy to make - cut a section from one side and attach magnets to the edge. The fairies have a lot of fun sliding down them!


Previous Posts About Playing With Magnets:

Magnetic Tree

Thursday, June 20, 2013

Noodle Box Fairy Houses


 These fairy houses are easy to make, can be played with in many different ways and can be used to store all of your little fairies (and their friends) between play times.
Bubble and Squeak have been toting these everywhere for the past week; they've been used in the bath (on suction hooks), in their bedrooms as part of the 'fairy village' they've painstakingly set up, in the backyard, in the car and at the local park where they use the handles to hang them from tree branches.
These would also be great to give away at parties and play days.

WE USED:

* cardboard noodle boxes
(we got ours for $2 for a pack of 6 at Hot Dollar)

* craft knife/scissors

* optional - things to decorate your fairy houses. I used buttons and the girls have also since added stickers and glitter glue.

Noodle boxes are available very cheaply from dollar shops and even supermarkets.

I used a craft knife to cut doors in the fronts of the noodle boxes and the girls picked out some buttons to decorate them with.
They have since added stickers and glitter glue to their little houses as well.

Bubble and Squeak have been storing all of their fairies and toys inside the houses between play times, perfect for grabbing before heading to the park.

In the bath we've been using suction hooks to hold the fairy houses.
Suction hooks could also be used in the car (on the windows), on mirrors, the front of the fridge and on house windows.
 
 The handles make them perfect for carrying and also for hanging in trees.

And they aren't just for fairies either ;)


Wednesday, June 19, 2013

Tea Bag Tea Party - Sensory and Fine Motor Play

We are not big tea drinkers in our house. Actually, the only time I buy tea bags is when interstate tea-drinking relatives come to stay, so it's no surprise that I came across a box of expired tea bags during a recent clean out of our pantry.
I set up the girls play table with bottles of warm water and some silicone tea cups, the tea bags and a big plastic tub. They had a lot of fun playing 'real' tea parties and there was plenty of sensory, fine motor and imaginary play going on.
Pouring the water, opening the tea bags, making their tea and then pouring it all into the big tub so they could start all over again. 
Bubble really liked the smell of the tea leaves and both girls were examining the dry bags before they went into the water, and experimenting with making the tea darker and lighter by varying how long the bags were steeped for and how much water they squeezed out. 
The highlight for both girls was dissecting the used tea bags inside the tub to see what was inside and feel the tea leaves. 
And make a nice big mess, who doesn't enjoy that! ;)

WE USED:

* tea bags
* warm water
* child safe tea set
* large plastic tub

You could also use tongs and spoons if your child is not keen on feeling the tea bags or to add a further element of fine motor practice.

It took a bit of practice for the girls to work out how to undo the tea bags and release the tags.

Pouring the water was fun and a little bit messy, the girls enjoyed playing with the warm water and watching it come out of the bottle. 
We used a clear glass bottle so they could watch the process but you can use whatever is appropriate for your child/children.

Squeak was intrigued watching the tea seep out of the bag and mix through the water.

When they had finished with their cups of tea the girls tipped them into the tub so that they could make more and examine the used bags later. 

There was lots of interest in dissecting the tea bags and finding out what was inside and where it came from.

Sunday, June 9, 2013

Play Dough Sushi

I've been clearing out our main pantry this week and came across an expired pack of seaweed nori sheets. 
Bubble and Squeak love making (and eating!) sushi so I thought they might also enjoy it as a sensory and imaginary play activity all rolled into one (pun intended).

WE USED:

* seaweed nori sheets
(you could also use dark green play dough rolled flat, green tissue or crepe paper)
* play dough
* rice (uncooked)
* water in small dish
* sharp knife 
(for parental use only)

I set up their outdoor play table as a sushi bar so they could make their own rolls.

To make the 'sticky rice' I fixed a few cups of uncooked rice into some plain white dough. The girls really enjoyed the texture and also the realistic element it added to their sushi rolls.

 I had to resist the urge the make the coloured play dough into different foods (grated carrot, cucumber slices etc...). I wanted to see what they made themselves and not dictate what 'should' go in a sushi roll, so I just put all of the colours onto one big plate.
We used a basic uncooked play dough recipe to make our dough (2 cups flour, 1 cup salt, 1 cup water mixed together).

The girls had a chopping board each and a blunt butter knife to cut their play dough fillings with. 

Smooshing out the play dough rice was Bubbles favourite part, she loved the feel of the rice under her fingers. 
This step was harder for Squeak who has less strength in her hands, so this was a fun but effective fine motor exercise for her.

There was lots of rolling, pinching, squeezing and squashing while the girls made their play dough fillings.

All sorts of things went into them, from tuna and chocolate to peas and cherries. 


Then it was time to get rolling!

The girls used their little bowls of water to wet their fingers and seal the ends of the rolls.


I then cut them with a fine sharp knife so they would have sushi rolls that looked just like the real thing.

They looked pretty cool!

The girls spent all afternoon creating more and more sushi rolls and then playing restaurants.


Don't forget the soy sauce!


Not only was this activity a fun way to use up expired food it also provided a great sensory, fine motor and imaginary play experience.
 
SOME OF OUR PREVIOUS FOOD PLAY POSTS:

Out Of Date Food Play


Friday, June 7, 2013

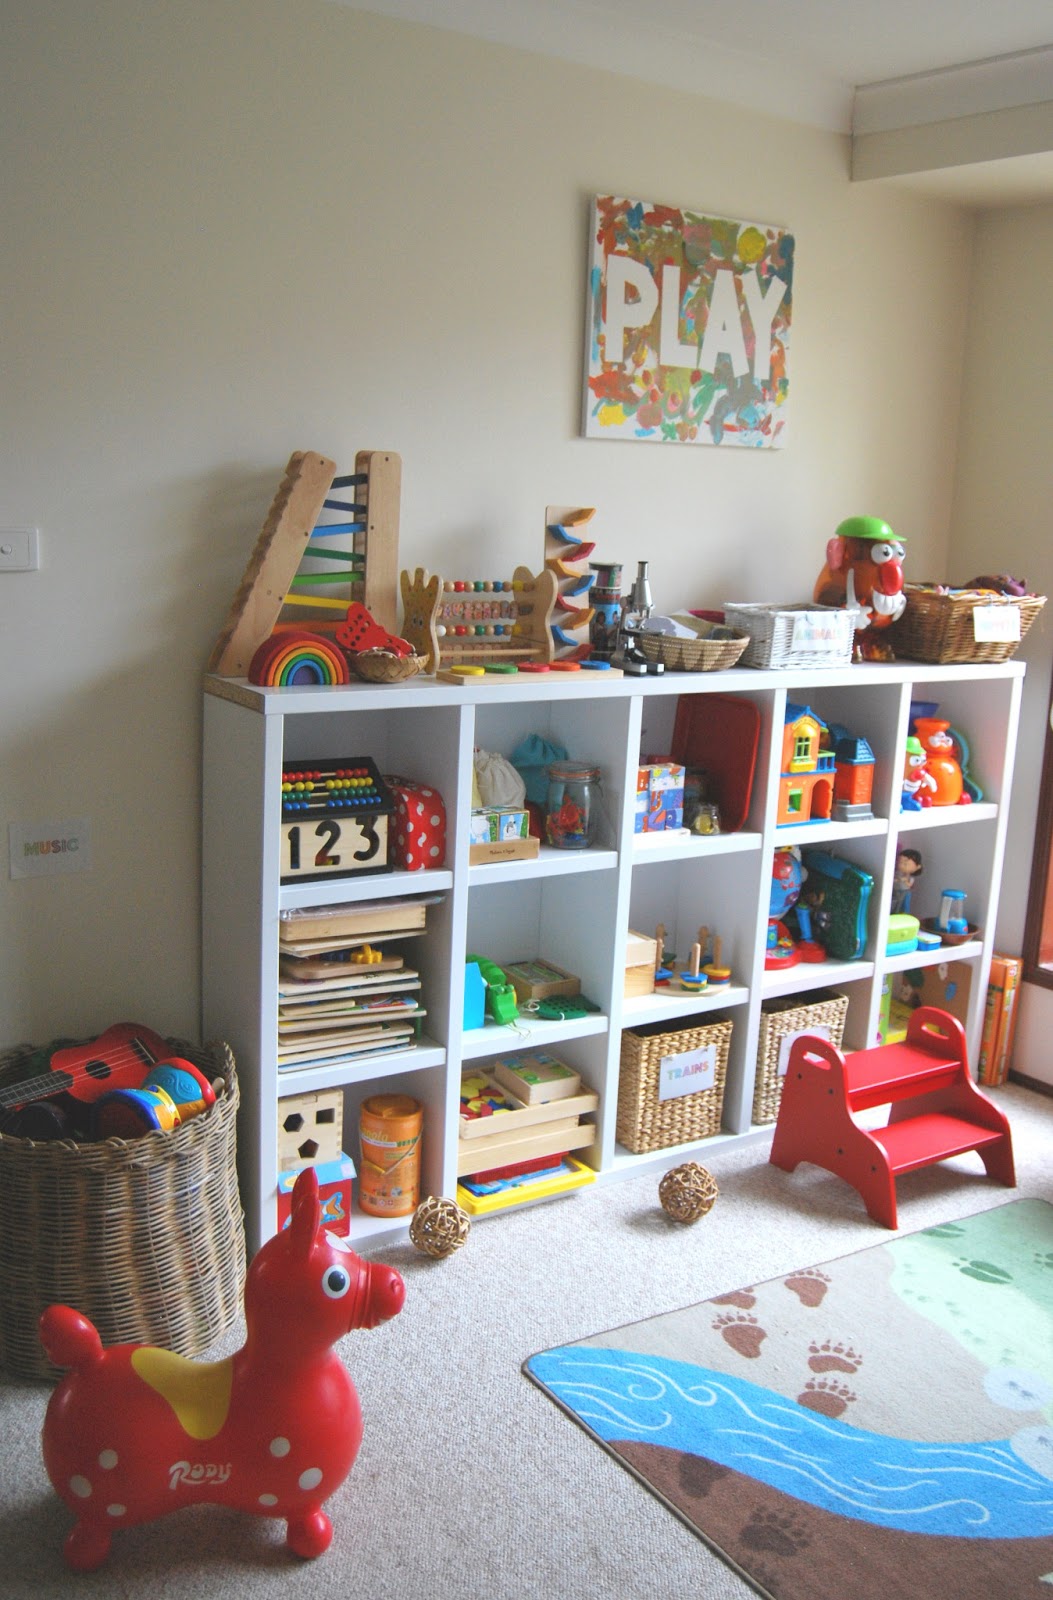
Play Room Tour PART 3 - Toy Storage Area

I have been doing a series of posts on our play room, if you missed the first two posts they are here:

Play Room Tour - Shop Corner

The toy storage area is where we keep most of the girls puzzles and games and is on the opposite side of the room to the learning area. It puts the activities within easy reach and makes rotating the toys that are available easier.
And don't be fooled, it doesn't always look like this :D Usually the shelves are a lot emptier and the floor is a lot messier!

The large baskets and open shelves mean activities and toys are easy to reach.

These step stools from IKEA mean Squeak can reach the top toys easier and is also often used as a seat.

An enormous basket holds our musical instruments.

We keep most of our puzzles and matching games down the left side.

And the most used toys and learning games down the right side.

We also keep some science equipment on the top shelf for Bubble as this is her biggest area of interest.

The girls created the wall canvas using painters tape and this method:
Attack Of The Twins Artwork Post


Monday, June 3, 2013

Sticky Wall Tangrams and Puzzles

Long time readers of our Blog will remember the Sticky Window Art activity we did back in 2010 which Bubble enjoyed immensely. Over the last few years we have pretty much permanently had a sticky wall or window set up somewhere in the house and both of the girls enjoy this sensory activity.
One of their favourite ways to use the 'sticky walls' is with puzzles and tangram shapes, not only is it fun to stick them to the wall and a great fine motor exercise, but the girls can also change the positions of the pieces easily if they don't get them in just the right place. 
This activity is great for problem solving and also imaginative play, so it's one of my favourite activities too.

WE USED:

* clear contact
* sticky tape
* tangram set
* puzzles

Sticky walls and windows are easy to set up, just peel the backing paper from a length of clear contact and then use tape in each corner to hang it sticky side out on a flat surface.
Make sure the surface won't be damaged when you remove the tape, we usually use a window or coated door like the one on our pantry.

 Squeak loves completing puzzles on the sticky wall. If the pieces don't go in exactly the right place she can easily peel them off and try again. 


Squeak's absolute favourite activity for the sticky wall would be using tangrams. Sometimes she follows the cards included in her set and sometimes she just makes up her own scenes and sticks them up.


Lots of imaginary play and fine motor building with her bear puzzle.


Other activities we have done using contact: