Sunday, July 22, 2012

Sequencing With Sticks & Stones

This game is very simple and another of the girls favourites when we're out at a play ground or park. You can use anything that is lying around that you can collect a few of (sticks, leaves etc...) and often the collecting part becomes an entirely separate activity of its own.

WE USED:

* any found items you can find a few of in the natural environment.
for example: sticks, leaves, stones/rocks, empty cicada or snail shells, gum nuts, seedpods, different types of grasses, flowers, shells, gravel, bark.

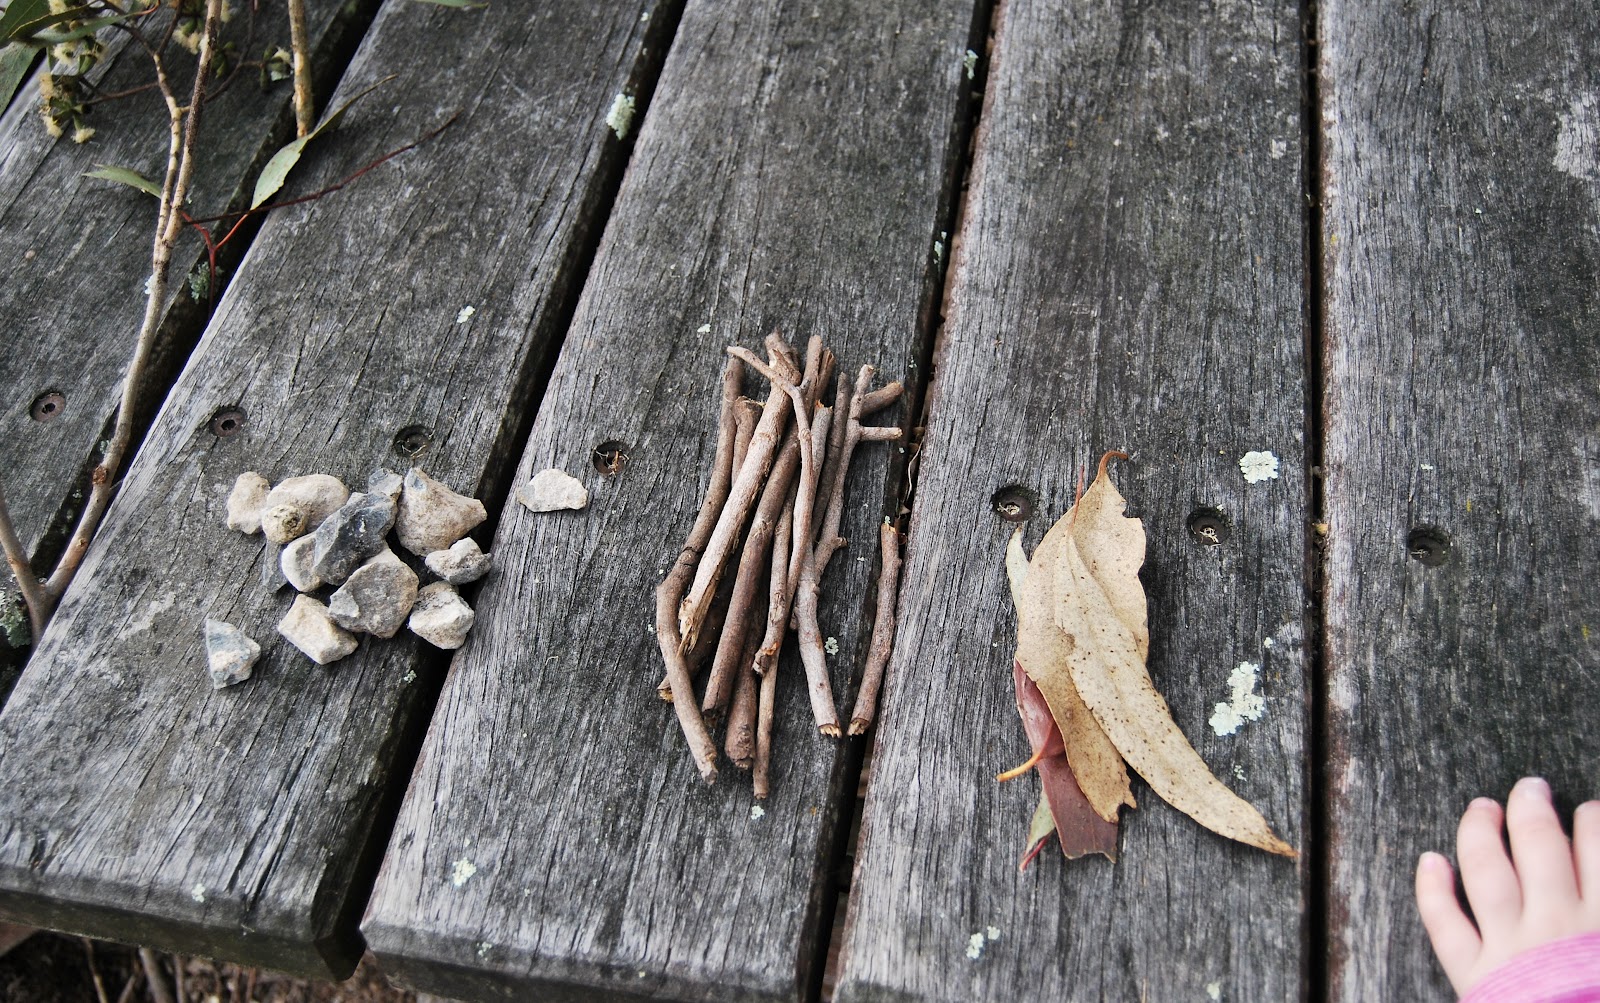
First make groups of your found objects. Today we collected sticks, stones and leaves for our game.

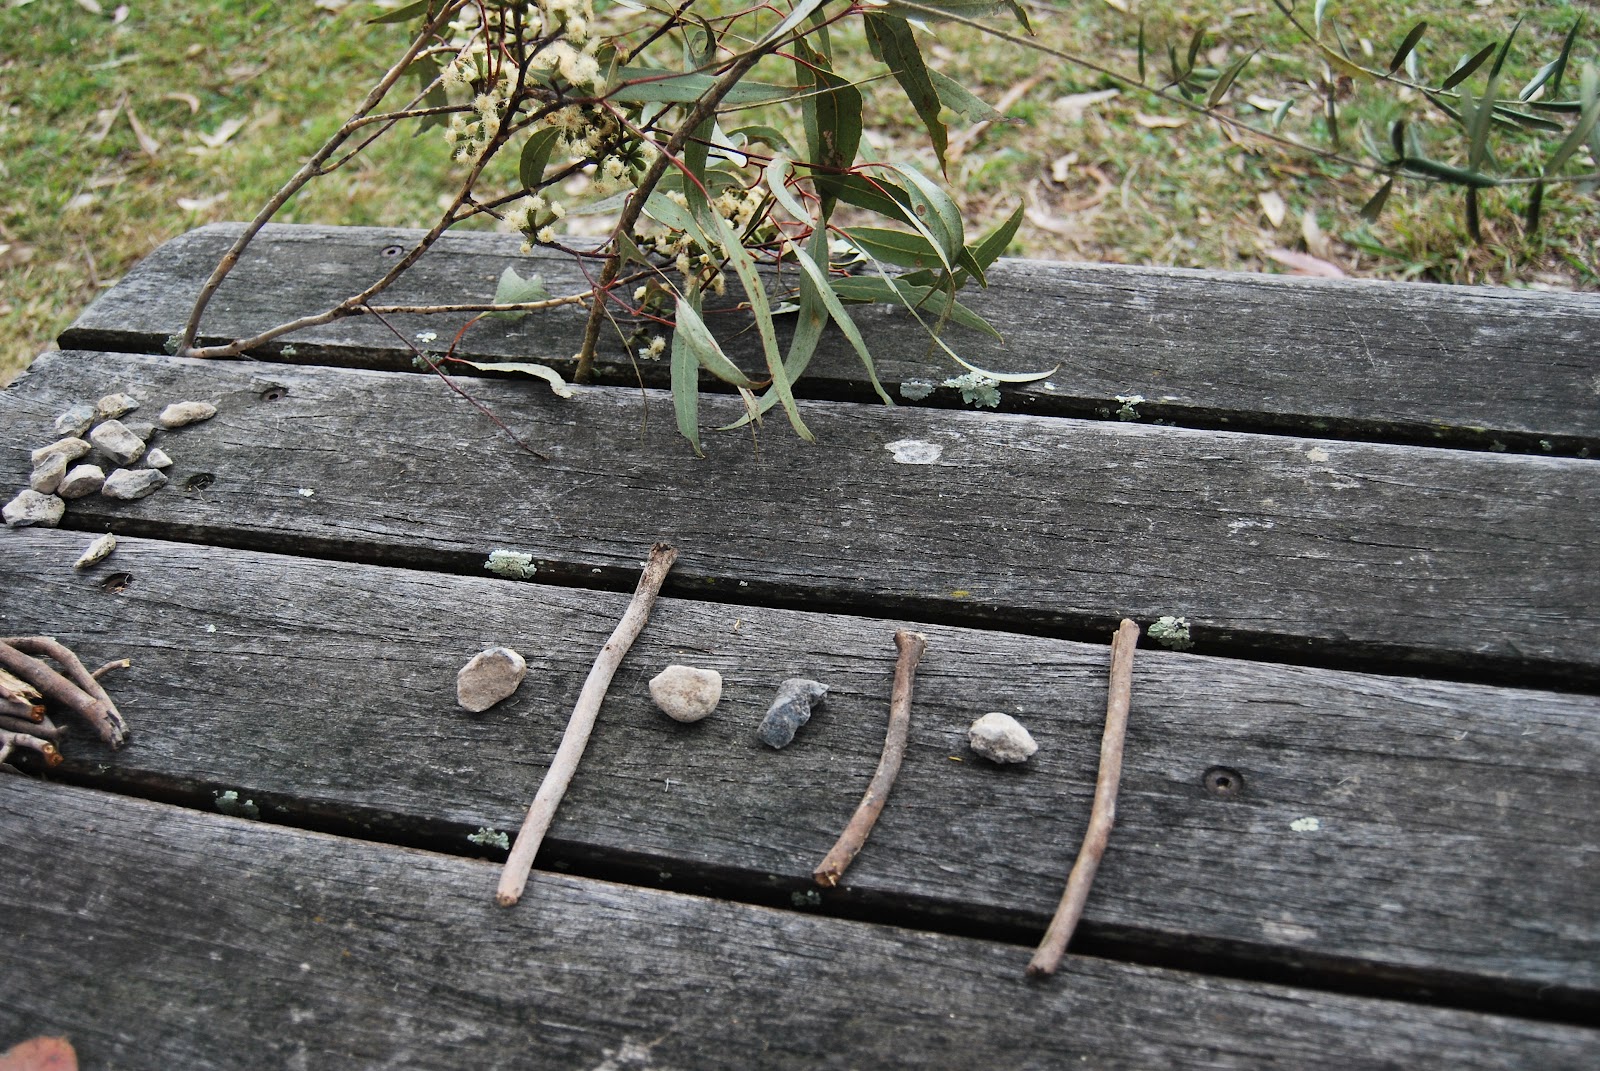
You can then use your objects to create sequences, as simple or as complicated as appropriate for your child.
Bubble (5) is quite good at this game and can solve pretty complex sequences independently, for Squeak (3) I make the patterns much more simple and we verbalise their order together out loud.


We often end up with sequences that go on forever! Well, almost :)


Outdoor Easel Painting

You have probably noticed from previous posts that we spend a lot of our time outdoors visiting parks and public gardens. We are lucky to live in an area where there are plenty within an hours drive in any direction, so we vary our destinations throughout the week.
Not only do the girls love to run around and explore, and enjoy the play equipment if there is any, but we also take along at least one activity to enjoy outdoors as well. There is no end of things you can do and I find even the most boring every day activities are much more exciting when they are done away from home.
One of the girls current favourites is to take along our table top easels and do some outdoor painting. Today we packed a picnic, a small bag of painting supplies and our easels and did just that. We were a bit lucky and managed to get in a few hours between storm fronts - it's a bit wet and windy on our side of Australia at the moment! 

WE PACKED:

* painting easels
(if you don't have an easel, check out this easy to make cardboard easel from Childhood 101)
* washable paints
* paintbrushes
* empty jar or cup for water
* rags for cleaning up 
(we use old face washers)
* painting smocks
* paint palettes
(I ask for the plastic cosmetic/deodorant packaging left over after night fill at our local supermarket)
* waterproof dropcloth/tablecloth
* paper
* empty shopping bag for any rubbish

Our easels have legs that attach to make them full size, we just remove them to make them table top sized and easy to transport.

Enjoying some (very brief) sunshine and painting away.


Tuesday, July 10, 2012

Library Reading Corner

We have needed a solution for our library books for awhile. We've tried using a designated bag and then a basket so that they are kept together, but inevitably they would end up all over the house by the time they needed to be returned. Sifting through every bookshelf in our house hunting out library books each week was getting a bit old!
It took me a few weeks of procrastination but we finally have a reading corner in the toy room, and so far the system is working a lot better. We re-purposed a little table found at one of our local charity shops and gave it a new life with a paint colour chosen by the girls.
The end result is bright (very bright!) but perfect for keeping my sanity somewhat intact on library day.

We found this cute little table a few weeks ago which looked perfect for the library corner.

It needed a lot of sanding and some repairs but luckily it cleaned up nicely!

The girls chose an aqua blue paint called 'Shampoo' by Dulux.


The reading corner gives the girls somewhere to sit and read as well as somewhere to store their books afterwards.
The frame on the wall was painted with 'Soft Sun', also from Dulux.
Instead of polystyrene balls inside our bean bag we filled the cover with all of the girls soft toys. Extra storage as well as a comfortable place to sit!


Monday, July 9, 2012

Cork and Popstick Rafts

This idea is not mine but a project Bubble found in a new book the girls bought this week called Disney Pixar Cars, Let's Party!
The minute she turned the page and her eyes glazed over I knew what we'd be spending the afternoon doing (luckily we have a bit of a stash of wine corks...*cough*).
The rafts were easy enough to make that the girls could do it all by themselves and the end result has provided hours of fun, both in the bath and out.

WE USED:

* corks
* craft/wood glue
* paddle pop sticks
* paper and textas
* wooden skewers
* scissors
* sticky tape

First the girls lined up their corks and put a dot of glue on the top of each one. Make it generous so the pop sticks adhere well when dry!

They then carefully selected their pop sticks (very important to get just the right ones ;D) and laid them on top.

Once the glue had dried (ours took overnight) we had two very sturdy little rafts. They made a sail each by decorating a triangle of paper and taping it to a skewer cut down to size. We then pushed the skewer into the middle cork to finish the raft.
(You could cut the tip off the skewer if you are worried that it is too sharp, our girls were OK with them though).

The girls enjoyed testing the rafts out in their rice tray. 


And later on we gave them a go in the bath - they worked great and are currently drying out for round two.