Thursday, February 6, 2014

Easy Peasy Valentine's Day Hair Clips


 This activity was easy and fun for both of the girls to do and as a bonus incorporated a lot of fine motor practice as well.

WE USED:

* felt sheets
* laundry markers
* scissors
* hot glue gun / craft glue
* hair clips

Don't have a glue gun or felt? Why not try this activity using cardboard/paper and double sided tape instead to make temporary hair clips for Valentine's Day.

First the girls used the laundry markers to draw hearts on their felt.
You could draw any shapes you like or even draw pictures and cut around the outsides of them, but both Bubble and Squeak had their hearts set on hearts!

Using scissors cut around the outside of your shapes.
Bubble could do this on her own easily, Squeak still needs my help with tasks like these.

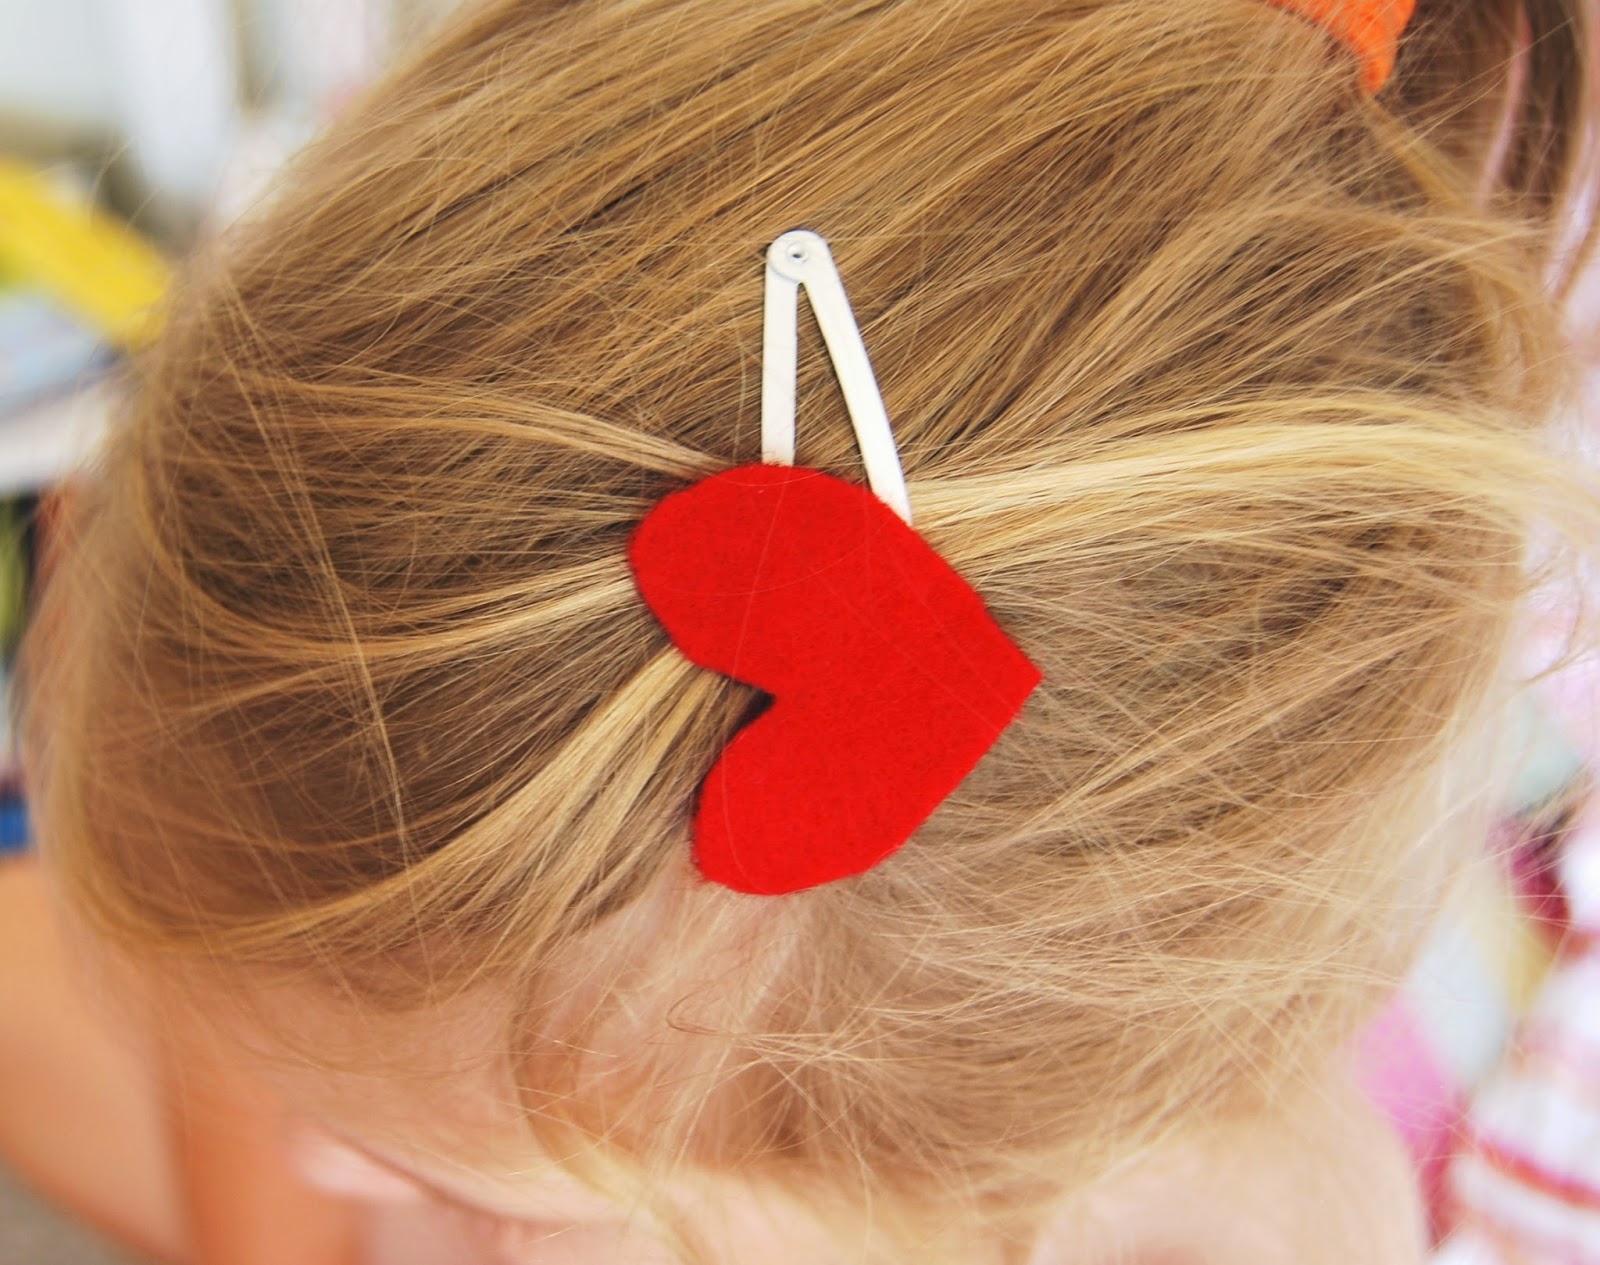
Once the girls had finished making their felt shapes I fired up the glue gun and they put a blob of hot glue on the ends of their hair clips

Then they could easily turn the clips over and (holding the cool end of the clips only) press them onto the backs of their felt shapes until the glue dried.
If you have never used a glue gun before please note that the gun, the glue and the object you are gluing get very hot. My girls were well supervised and did not touch the clips until the glue had cooled and set.

We made a whole stack of clips in under fifteen minutes - a nice fun after school activity that would make great presents as well.


Monday, January 27, 2014

Paper Plate Letterboxes - Valentine's Day Activity

We try to encourage closeness between our girls every day, in lots of little ways. With Valentine's Day approaching we made these very simple letter boxes for their bedroom doors, they were fun to make and they are both excited to write and leave notes for each other over the coming weeks.
Both Bubble and Squeak are also secretly working on a special Valentine's Day card for each other to post the night before, it's beautiful to watch them both working industriously on their 'surprises'.

WE USED: 
* paper plates
* textas
* stapler
* string
* scissors
* hole punch (optional)

We used large sized paper plates but you can use any size.

 Using a marker we drew the top of our heart on our plate in a 'V' shape.

Then we cut the V section from the plate to create a rounded heart shape.

We used the cut piece as a template to mark out the outline for our other plates.

Bubble easily cut her own plates but Squeak is still finding fine motor activities challenging so I helped her cut hers using a hand over hand method.

Once you have cut your two plates face them towards each other (to create a pocket) and then carefully staple around the edges to hold your letter box together.
Bubble (6) could do this herself, but I did Squeak's (4) for her. You are the best judge of whether or not your child can safely use a stapler or not.

Using a hole punch we made a hole on either side at the top. If you don't have a hole punch a skewer or sharp pencil will do the job too.

We tied some string through the holes so our letter boxes could hang on the girls bedroom doors.

The girls both decorated their letter boxes ready for their secret notes.

I set up a writing station on top of their library book table where they could make special notes for each other.
I included shaped notepaper, colourful gel pens, stickers and stamps.
All great for making pretty letters and for developing fine motor skills at the same time.
Bubble and Squeak have already been writing each other little notes and drawing pictures for one another, I'll be leaving little surprises in there for them as well from time to time.
 A fun craft activity and a lovely way to encourage communication.

Monday, January 20, 2014

Kickboard Sight Words

It is hot hot hot here at the moment. Our girls have been alternating their time between the backyard paddling pool and sprawling in front of the lounge room fan.
The weekend was particularly hot (47'c, yikes!) so I thought I'd try out some fun and sneakily educational activities for us to do in the water while we kept cool.
This game was the most popular with both Bubble and Squeak, Squeak in particular wanted to play it over and over again which was a great thing to watch  as she usually tires of letter games pretty quickly!

WE USED:

* paddling pool
(you could do this activity in the bath, a pool, a large container of water or a sink too)

* kick board
(you can use anything that floats - esky lid, lid from a large plastic container, pool toy etc...)

* foam alphabet
(if you don't have foam letters you could also use bottle lids with letters written on them, laminated letter cards, cut up a sponge into squares and use permanent marker to write letters on the pieces - use anything that floats!)

* sight word cards

I grabbed our foam letters from our bath toy stash and used some sight word cards of Bubbles from last year. We also used tongs to add some fine motor exercise for Squeak who needs to work on her hand strength.

 We threw the foam letters into the pool and the girls swirled them around and around to mix them all up.

I gave them a kick board each and put a sight word card at the top of the board.

The girls then splashed around finding their letters and sounding out the words.

Squeak, who ordinarily tires quickly of these sorts of activities, enjoyed it so much she went through all 20 word cards in our deck.


Using tongs added a bit of extra fine motor exercise.


Thursday, December 19, 2013

Easy Peasy Santa Plates

Since our special Santa Plate met an untimely end last year the girls wanted to make another one for Santa's cookies and treats to go on this year.
Today we got out some paper plates and made some fun, easy and food safe Santa Plates for the man in red and his reindeer as well. 
They turned out very cute, I'd love to make a collection of these and add to it every year.

WE USED:

* paper plates
* food colouring
* small clean paintbrushes
* water
* cloth

Since there will be food going on these plates we are using food colouring to paint with instead of actual paint.

 I set out our food colouring inside jar lids so it was easy to access.

The girls really enjoyed making these for Santa, we ended up with four of them! Enough for Mrs Claus, the elves and reindeer too.


Bubble created one with a Christmas tree and another with a star.


Squeak painted the reindeer on hers :)

Wednesday, December 18, 2013

Biscuit Houses

Bubble has been begging and begging to make a gingerbread house this Christmas. The thing is I feel like I’ve been baking day and night since the start of December and I still have plenty more to do before the ‘big day’, so the thought of baking gingerbread that won’t get eaten wasn’t really appealing.
I didn’t want the girls to miss out on the experience though so we picked up some biscuits from the shops during our last grocery run and today I set them out with bowls of treats to use for decorations and thick icing.
They had a blast getting messy and creating some sticky little biscuit houses.
 

WE USED:  
* biscuits
(we used Arnotts Nice biscuits but any kind will work, they are just the only shop bought ones our girls will eat!)
* icing
(I just used pure icing sugar and made the mix as thick as possible)
* things to decorate
(we used Smarties, chocolate dots and naturally coloured sprinkles)

I put out a chopping mat for each of the girls as well as biscuits, icing and decorations.


Squeak (4) needed a bit of help to get her icing on her biscuits but found it easy to stick them together herself.

Bubble (6) was able to do it all by herself, she was very proud :) 
The girls then got busy icing and decorating their houses however they liked.
A few Smarties may have been taste tested in the process.
OK, a lot :)

It was super hot here today (41'c max, hello Summer) so we needed to prop our houses up on each side while they dried or else they kept toppling over!

The girls experimented with different techniques for putting on their decorations; applying icing to the houses and adding them, putting icing on the decorations themselves and then sticking to the house, drizzling icing over the top and using knives and spoons.

Squeak's house under construction.

Bubble's house getting some roof work done.

Squeak's yummy looking Biscuit House.

Bubble's finished Biscuit House looked adorable.
Great work girls!

Monday, December 16, 2013

Cutting Skills - Play Dough Christmas Shapes

Squeak's fine motor development has been our big focus these last few weeks and since she is very keen on doing Christmas themed activities at the moment a lot of our skill building has revolved around that.
Today we used play dough, some Christmas cutters and scissors to get in some more fine motor exercise.

WE USED:

* play dough
(I made normal play dough then thickened it using extra flour so it would be easier to hold and cut)
* cookie cutters
* child sized scissors

The girls chose some Christmas shaped cutters from the play dough box and I made some especially thick play dough for this activity by adding extra flour to our mix.

First we rolled the dough flat.

Then we used our cookie cutters upside down so they just made an imprint instead of cutting all of the way through.

The imprint on the play dough gave the girls a template to cut around.

Then the girls got to work with their scissors cutting out their Christmas shapes.
Because of the extra thick dough it was easy to handle and also cut.

While little Squeak used play dough scissors Bubble used ordinary scissors.

Ordinarily cutting is an activity Squeak avoids like the plague. Everything about it frustrates her as her joints fatigue and get painful and she lacks very fine motor control. This activity was different though, the sensory nature of the play dough and also the novelty of cutting dough rather than paper kept her interested for over half an hour.

The girls ended up making lots of different Christmas shapes.

Well done Squeak, keep practicing x