Showing posts with label Scissor Skills. Show all posts

Friday, December 24, 2010

Christmas Rosettes

I remember making stacks of these as a kid but hadn't given them a second thought until I saw them again recently used as party decor on Little Sooti's beautiful blog. I decided to make a couple of rosettes from some red and brown paper the kids had done chalk drawings on and despite the fact I only used two sheets instead of three they turned out great! My sticky taping skills could use some work though :-D Quick, easy and effective - my kind of decorating!

WE USED:

* paper sheets (I used a sheet of red construction paper and a brown paper bag that the kids had drawn on)
* sticky tape
* twine/wool/string
* hole punch or pen to punch hole with

Link to Making Paper Rosettes


Tuesday, December 7, 2010

Straw and Pipe Cleaner Candles

My girls LOVE singing Happy Birthday, for the past few months it's practically been our family anthem. They both invent all sorts of things to be our 'cakes' and they think the part where we pretend to blow the candles out is utterly the best thing ever. Lately Bubble has been asking me over and over for 'real candles' to blow out, so today we did a bit of experimenting and came up with these. Suffice to say they were popular :-)

WE USED:

* drinking straws
* scissors
* pipecleaner (we used yellow)
* playdough or similar

First I cut the straws in half then cut slits in the sides about three quarters of the way down. Cut through about half of the straw but no more than that.

Push a cut pipecleaner through the slit in the side of the straw, it should slide in easily.

Push the pipecleaner all the way through the straw until you have enough of it sticking out the top to fold over. Bend and secure the other end into a loop so that it is secure and the pipecleaner cant be pulled out of the straw by accident.

You can then pull the 'flame' of the candle up and down using the looped end.


We made a playdough cake with our Christmas Playdough for our candles to go in.

As the girls blew out each candle we pulled the loops to make the flames disappear.

One candle blown out.

All gone! The flames pop back up easily when you push the pipecleaner up again. Be prepared for a LOT of singing ;-D

“Come over to play at the Childhood 101 We Play link up”
We Play


Saturday, December 4, 2010

Christmas Paper Chains

Day 5 of our Christmas Countdown involved making paper chains - I remember making these as a child for hours and hours seeing who could make the longest one! Bubble's attention span didn't quite stretch that far, but she really enjoyed this activity and the results are very prettily draped across our kitchen. :-)

WE USED:

* coloured paper
* scissors
* stamps
* sticky tape

In todays Count Down Calendar bag Bubble found this Christmas roller stamp. I cut the coloured paper into strips and she had a ball decorating each one with her new stamp.

The rolling action was a bit tricky to do just right but she had it figured out after her third strip, it was a great fine motor and co ordination exercise for her.


We cut small pieces of tape and lined them up along the edge of the table where Bubble could get them easily.

Then I helped her hold each loop while she taped them closed.

Our very festive roller stamp paper chain :-)


Friday, December 3, 2010

Paper Plate Christmas Trees

WE USED:

* paper plates (2 sizes)
* scissors
* ruler
* cardboard tube
* paint
* bingo marker
* blutac (or you might prefer to use glue)
* sticky tape
* yellow paper
* cotton ball

Using a ruler to get your lines straight cut three segments from the paper plates, each a little smaller than the last. I cut the biggest and smallest pieces from a large plate and the middle from a small plate, but you could also use the same plate for all three.

This is how the pieces go together to form a Christmas Tree shape.

We made some green paint by mixing yellow and blue together (Bubble is right into colour changing at the moment).

Then the girls painted the segments of their trees.

I cut two trees so Squeak could make one too. I stuck the pieces to her highchair tray with blutac and let her go for it with a paintbrush (and her hands ;-D).

Once the paint was dry Bubble decorated her tree with some 'baubles' by dabbing on ink from a bingo marker. A cotton bud and paint would do the job too :-)


I showed her how to add snow around the edges using a cotton ball and white paint and she decorated all three segments.

We cut a yellow star from our coloured paper and used blutac to assemble our tree. You could also use glue if you wanted, we were just impatient!

Squeak's tree :-)

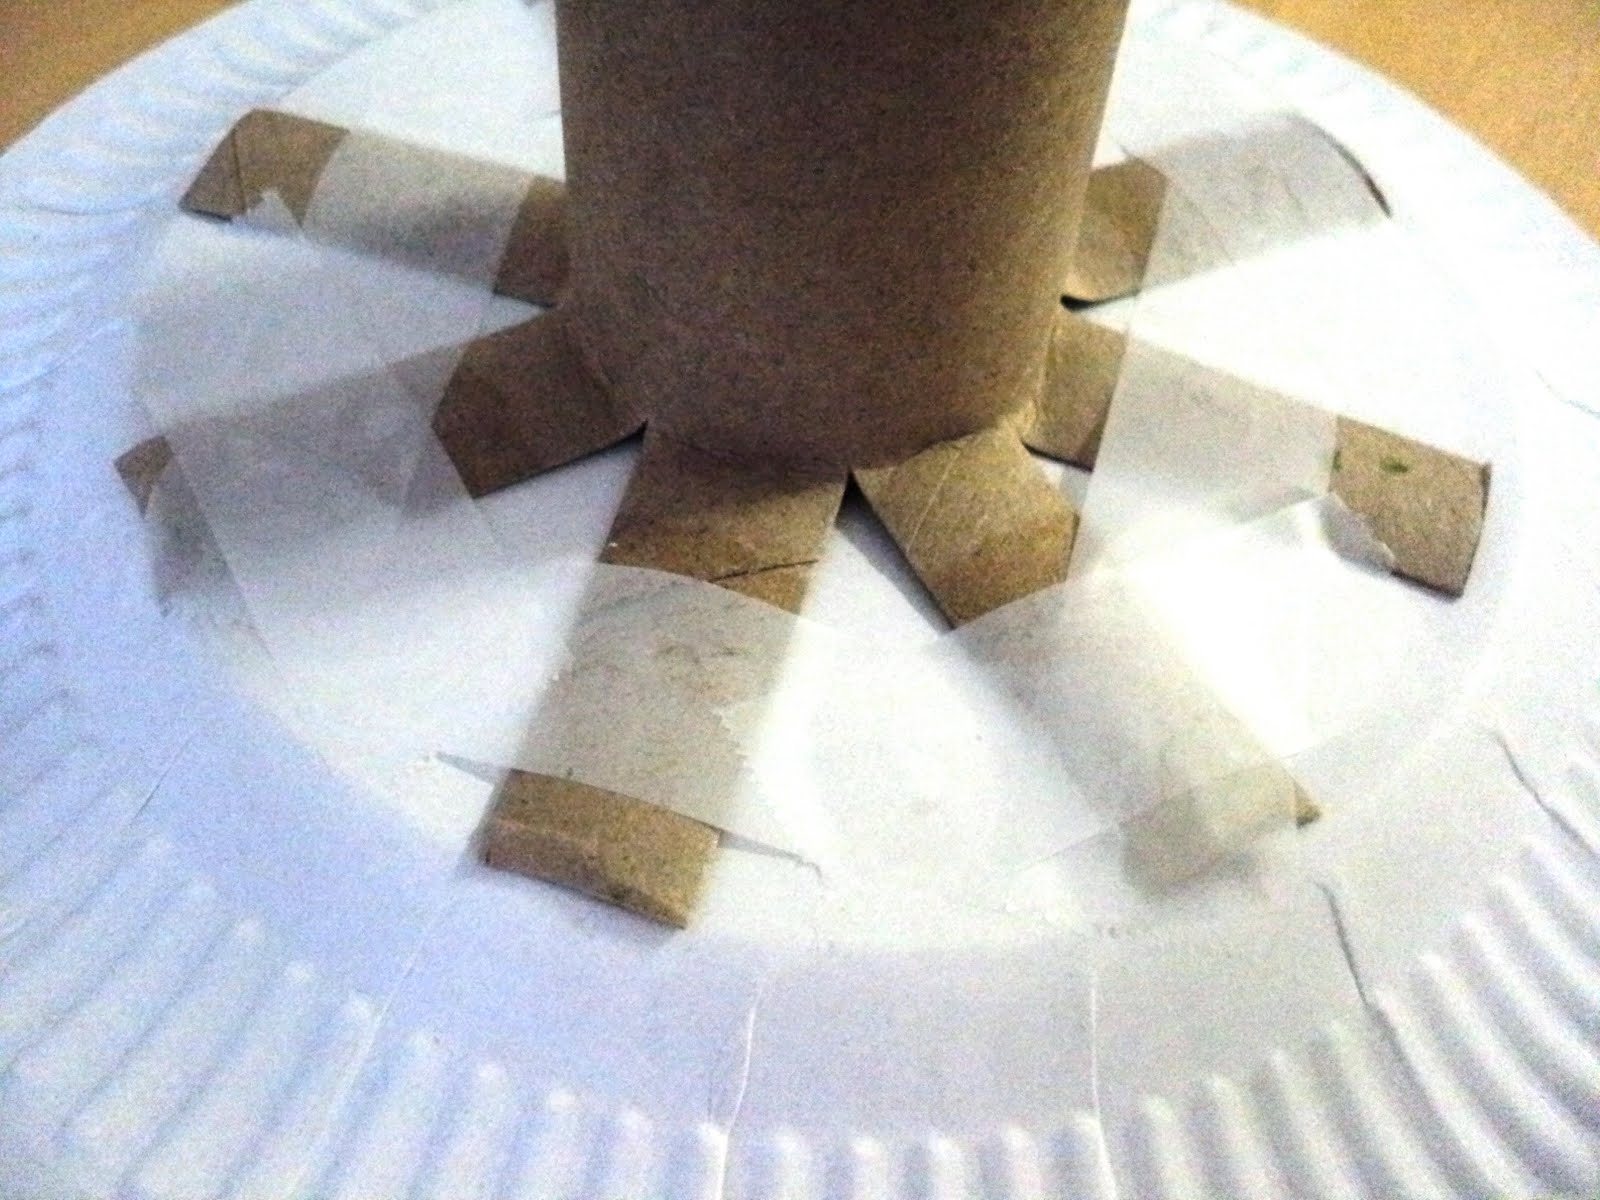
We made a trunk for our Christmas tree by splaying one end of the cardboard tube and taping it to an upturned paper plate for stability.


Our very cute paper plate Christmas tree :-) This is Squeak's side.

And Bubble's side.


Sunday, November 21, 2010

Cutting Skills - Business Cards

Business cards are the perfect size for practicing cutting with, and not only are they easy for small hands to hold and manouvre they are also usually thicker than normal paper as well. We save ours and other junk type mail (calendars etc...) in a box just for this purpose. Sometimes I draw lines across the cards for Bubble to cut along and sometimes she just likes to hack them into itty bitty pieces :-D

WE USED:

* business cards
* scissors


Wednesday, November 10, 2010

F is for Fairies

These little fairy paper dolls were easy to make and perfect for our letter wall theme 'F'. I used a great template page I came across on the net (link found here), and think the alien is also pretty awesome and would love to give it a go sometime soon! Bubble chose to decorate them with texta, glue, glitter (oh so much glitter!) and felt pieces she cut with scissors.

WE USED:

* template
* scissors
* markers
* glue
* decorations for your fairies

I cut some paper dolls using the fairy template on some lilac purple scrapbook pages. I realised after Id cut the first one out that I should have drawn the template on the reverse instead of the front though! Luckily Bubble didnt seem to mind :-D
For anyone who has never made joined paper dolls, Im so sorry I forgot to take photos of the process, but this link is a great written tutorial:
eHow Making Paper Dolls

Bubble had a lot of fun using copious amounts of glitter on her fairies (getting the excess glitter out the rug was a tiny bit less fun)

She also used her scissors to cut bits of felt from strips we had.

One fairy has more felt decorations than the others because she is 'the Mum Fairy' aparently :-D


Tuesday, September 21, 2010

Cutting Felt

Bubble loves fine motor activities like cutting and drawing, but finds them a bit tricky. To encourage her to develop her skills we give her lots of different textures and mediums to work with, like these felt offcuts for practicing her cutting skills. It's not only nice to cut but requires different pressure and technique than those used for cutting paper, and Bubble liked creating her own little picure from something a bit different. We also vary the types of scissors available to use, giving her a chance to try out different sizes, styles and handle shapes.


'B' is for Bucket

Our third project for the 'B' wall today was the word 'bucket', which was quite fitting since both girls have been quite unwell the last few days! We had plans to do other things but had to stay home and keep our germies away from the public, so this was a great little project to spend the afternoon doing while Squeak (finally) had her nap.

WE USED:

* scrap cardboard (we used a flattened box)
* paints and brushes
* scissors
* snap lock bag
* clear contact/laminate or you could just use tape
* small items to go in your bucket (we used brown lentils and shells)

To start with I cut a (very dodgy looking) bucket shape from the cardboard, also cutting a square window in the centre. Make sure the window is slightly smaller than the snap lock bag you have.

Bubble then painted her bucket.


Then she filled the Snap Lock bag with some lentils...

and added some shells as she had decided ours was a beach bucket.

Once the paint is dry turn the bucket over and position the snap lock bag to fit in the little window in the centre.

You could use tape to secure it, but I just cut a large square of clear contact and laid it over the back of he bucket. This held the bag in place but wasn't visable from the front.

Our finished beach bucket :-) I left the snap lock bag opening visable at the side so we could change what was in it if we wanted to.

Bubble hanging her bucket on the 'B' wall.


Come play at the Childhood 101 We Play link up
We Play